
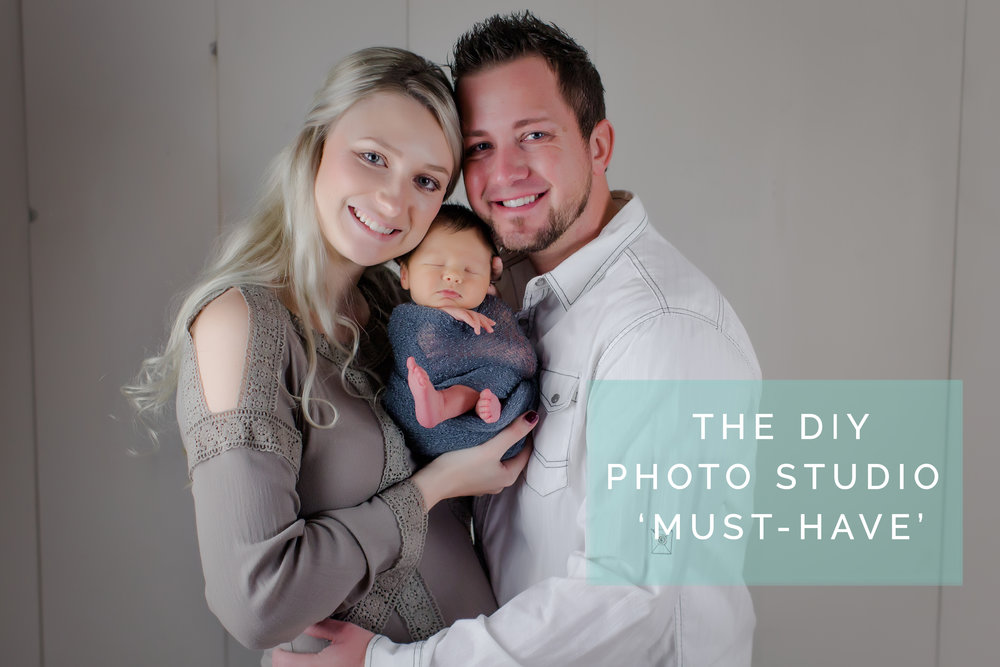
My photography studio is located in a small, lower level, of a historic building, along the Missouri River. If you’re a client of mine, you’ve probably noticed my love-hate-relationship with the unique space, as backdrops fall, I trip over props, etc.! It’s a narrow area to photograph families or even groups of four, and I really thought it was a problem that didn’t have an easy solution.
This DIY project had been on my mind for a few years, but wasn’t sure how I would produce something so versatile and safe without spending a lot of time on it. After attending Heidi Hope’s studio workshop last spring, I wanted a wood plank backdrop even more, after shooting many photos in front of hers. A couple weeks ago, my BFF and photog friend, Janelle, brought her husband’s truck to the studio and said, “let’s do this.” That’s all it took! I still question why it took me so long to actually work on this, because it was easy, fun, and I seriously went to bed with a smile on my face that night – only because it’s one more item, crossed off of my lengthy goal list.
If you’re a photographer with a small studio space, this is a must-have. I prefer this over any of the 75+ backdrops I currently have! Ok, so let’s get to the good stuff!
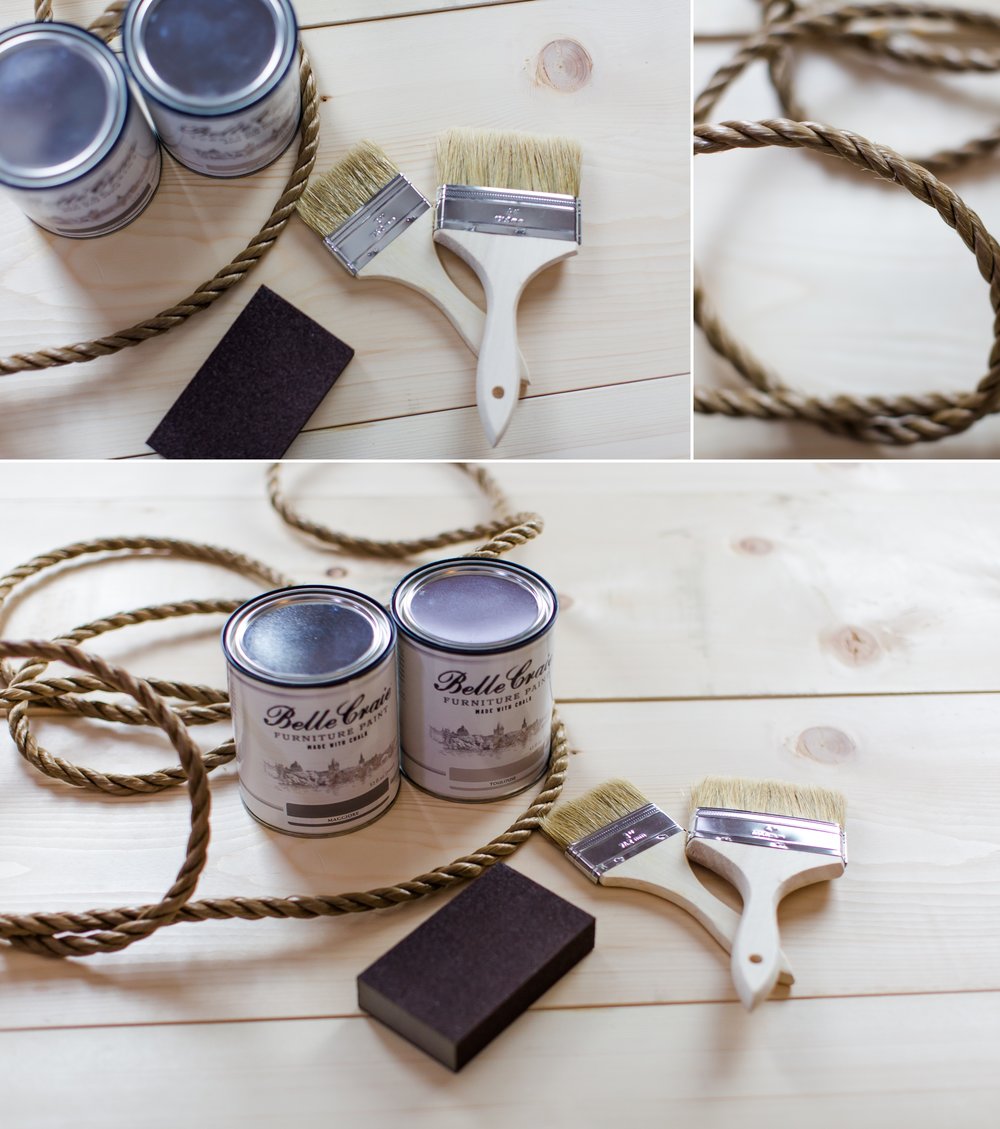
Supplies needed for wood plank backdrop:
-
Six – 12-ft x 12-in x 1-in Wooden Boards (you can ask a hardware store clerk to cut them in half before purchase and this will save you a ton of work!)
-
64 oz. of chalk paint (your preference – I have used lots and they are all about the same quality)
-
Wax or sealer for chalk paint (again, personal preference on this as well!)
-
Paint brushes (opt for mid-range brushes, as cheap brushes lose bristles too quickly..lesson learned!)
-
Sanding Sponge
-
Thick rope to secure the wood from falling
-
Screw Hooks to secure rope
-
Rags to clean any dust from sanding or to wipe paint drips
-
Drill and drill bits to help install screw hooks
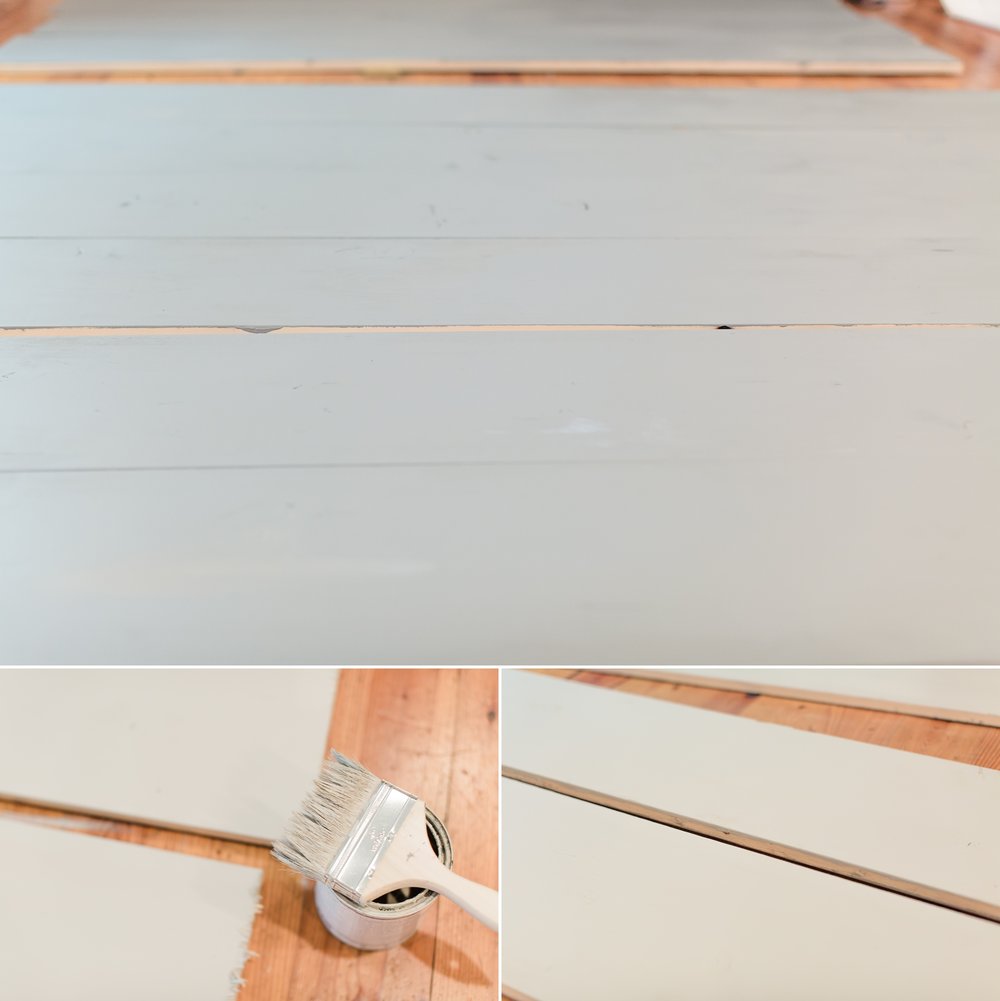
How We Painted the Wood Planks, Quickly
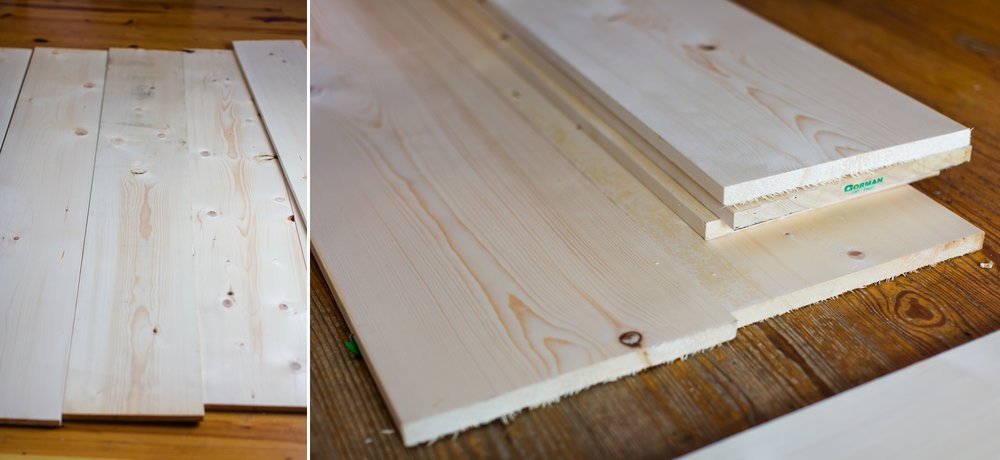
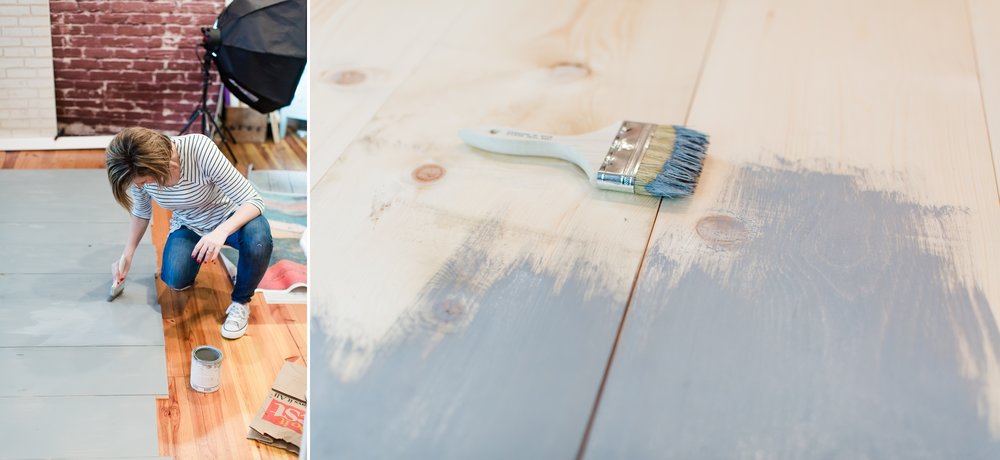
Since we now had 12 planks (remember, the original six pieces were each cut in half at the hardware store), we lined them all up in a row and began painting the first side, a darker grey, which looked blue until it dries! We used Belle Craie Funiture Paint, in Maggiore.
You could use a roller, but since I don’t have a deep sink at the studio, I didn’t want to worry about cleaning a paint pan, roller, etc. I also like the way the brush streaks look on the wood grain. It helped me determine how much paint to use without losing the wood charm, such as knots and texture, you could easily see through the paint.
How Much Paint did it Take?
Two coats of chalk paint for the first side, and bam – ready to flip them to paint the other side. In less than one hour from start to finish, we were able to get an entire side of the 12 planks painted!
You can see the different colors in the photo below. Side #2 (bottom photo) is Belle Craie Furniture Paint in Toulouse. I chose a “Greige,” because I often ask myself, ‘WWJD?’ (aka What Would Joanna Do?). And, I love photographing neutrals because they coordinate with my clients’ clothing, and display beautifully in their homes.
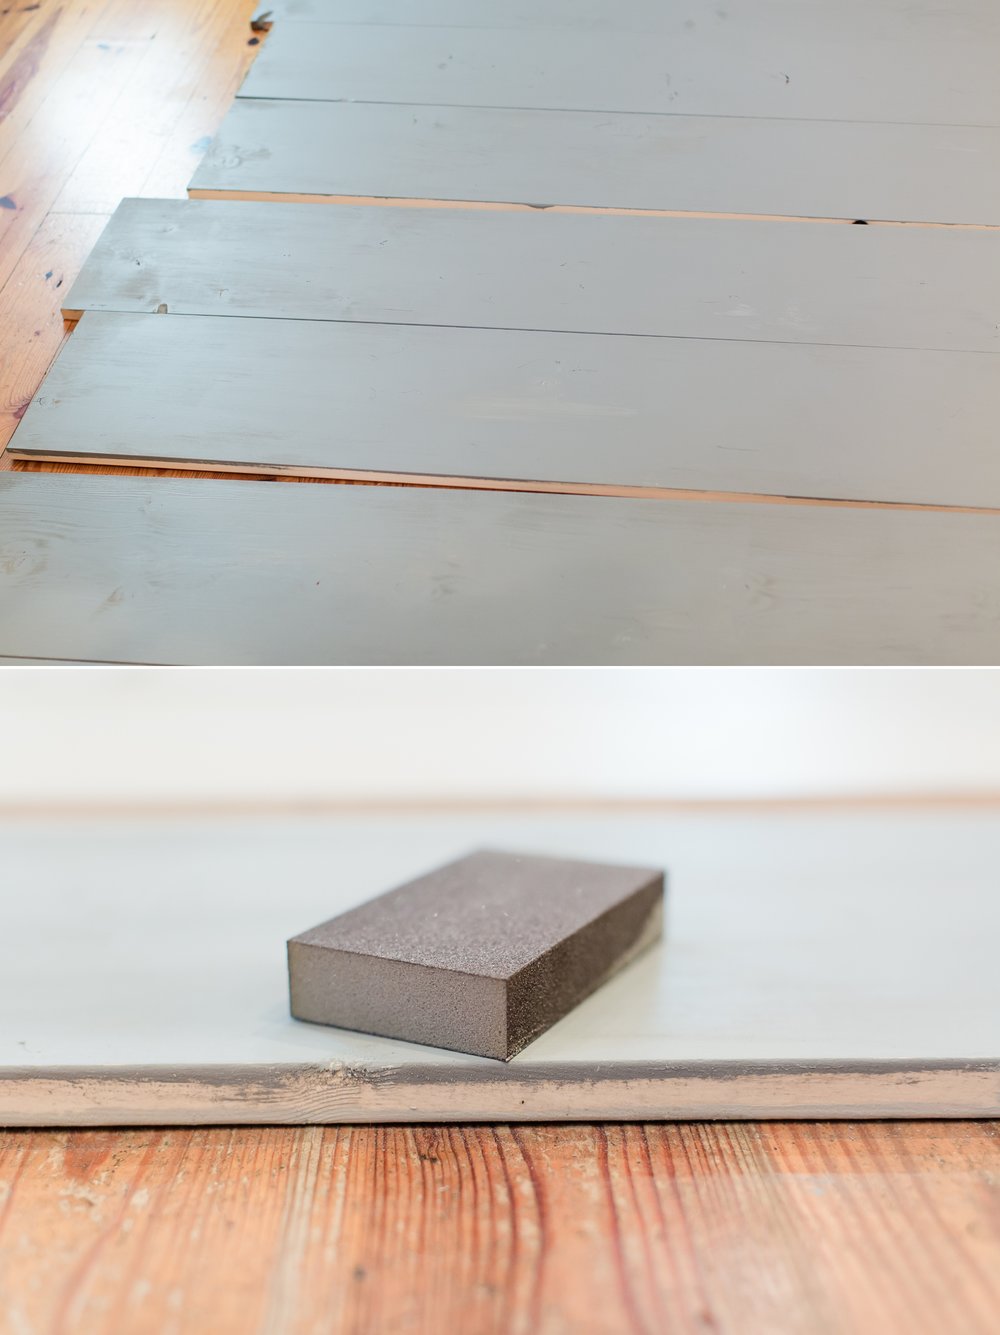
COLOR CHOICE AND DISTRESSING THE PAINT
Once side #2 was dry, I wanted to go back and sand the edges of side #1, the darker shade, for more of a “worn” look. I used a sandpaper sponge to do this, much easier than pushing on a piece of thin sandpaper. (No manicure needed after this, but you could totally use it as an excuse to get one anyway.)
To Wax or Not To Wax
I decided not to use a wax on these – just bare paint. This particular chalk paint we used was staying put, so I only roughed up the edges of the darker side with the sand sponge, to add dimension, and Janelle wiped them down with a damp rag, to avoid extra dust laying on the paint.
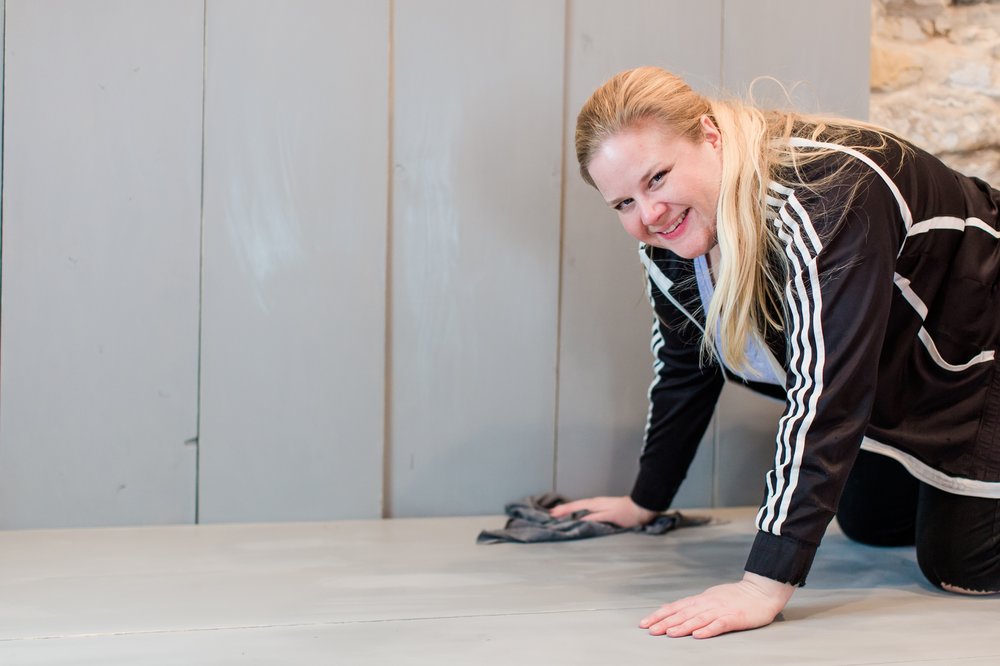
Wood backdrop Flipped for a different look
Here, I am turning the wood planks to see how hard/easy it would be with people in the studio, before we secured it with screw hooks and rope. So easy and I only smashed my finger once! (Good excuse for a manicure.)

SIZING IT RIGHT
Also, since each wood plank is a foot wide, six or seven planks for a backdrop make the shooting space wide enough to use my 50mm lens for small families and babies. What’s also nice about this backdrop, is that I can add to the sides by removing any boards on the floor, because I care more about the width than the depth, for a small family, since I wouldn’t want any subject coming off of the backdrop, or making more Photoshop work for myself! This also allows me to get creative, depending on my group size or what decorations I may have in the background of a newborn session.
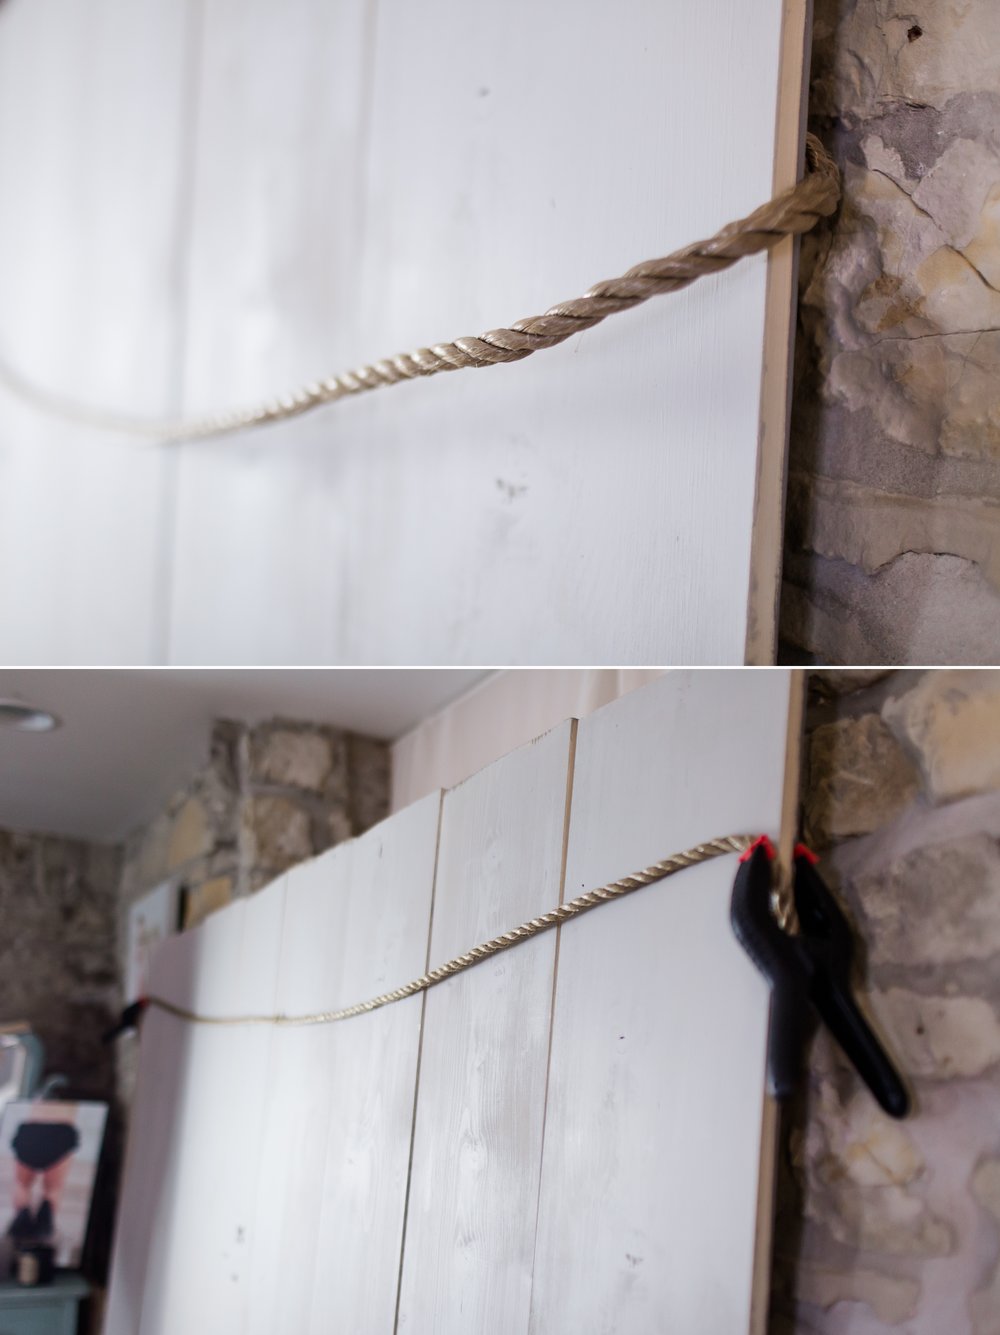
Securing the Rope, wood backdrop
Using the screw hooks, Janelle screwed them into a wood ledge, connected to the wall. Then, we knot-tied the rope several times, securely, around each hook, so the rope cannot move easily. This also means, the wood will stay in place and keep my clients safe!
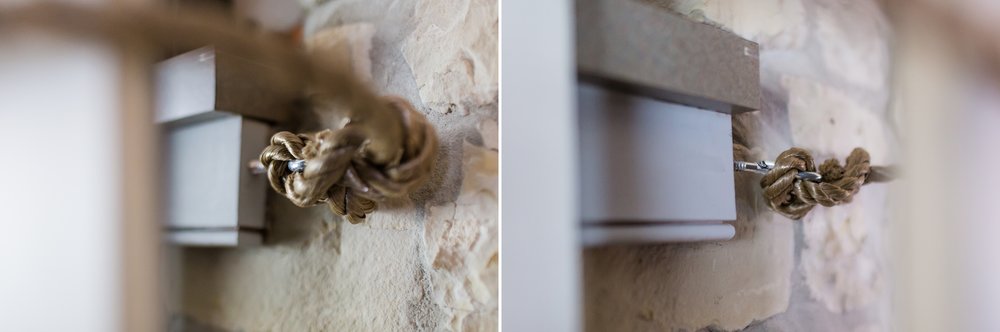
If I want to remove boards from either side of the backdrop, to make it a smaller size, the rope would be loose, so I can easily tighten the rope around the hooks further, and use a clamp to hold the rope higher, so it’s not appearing at the top of my photos. Super easy and still, so safe!
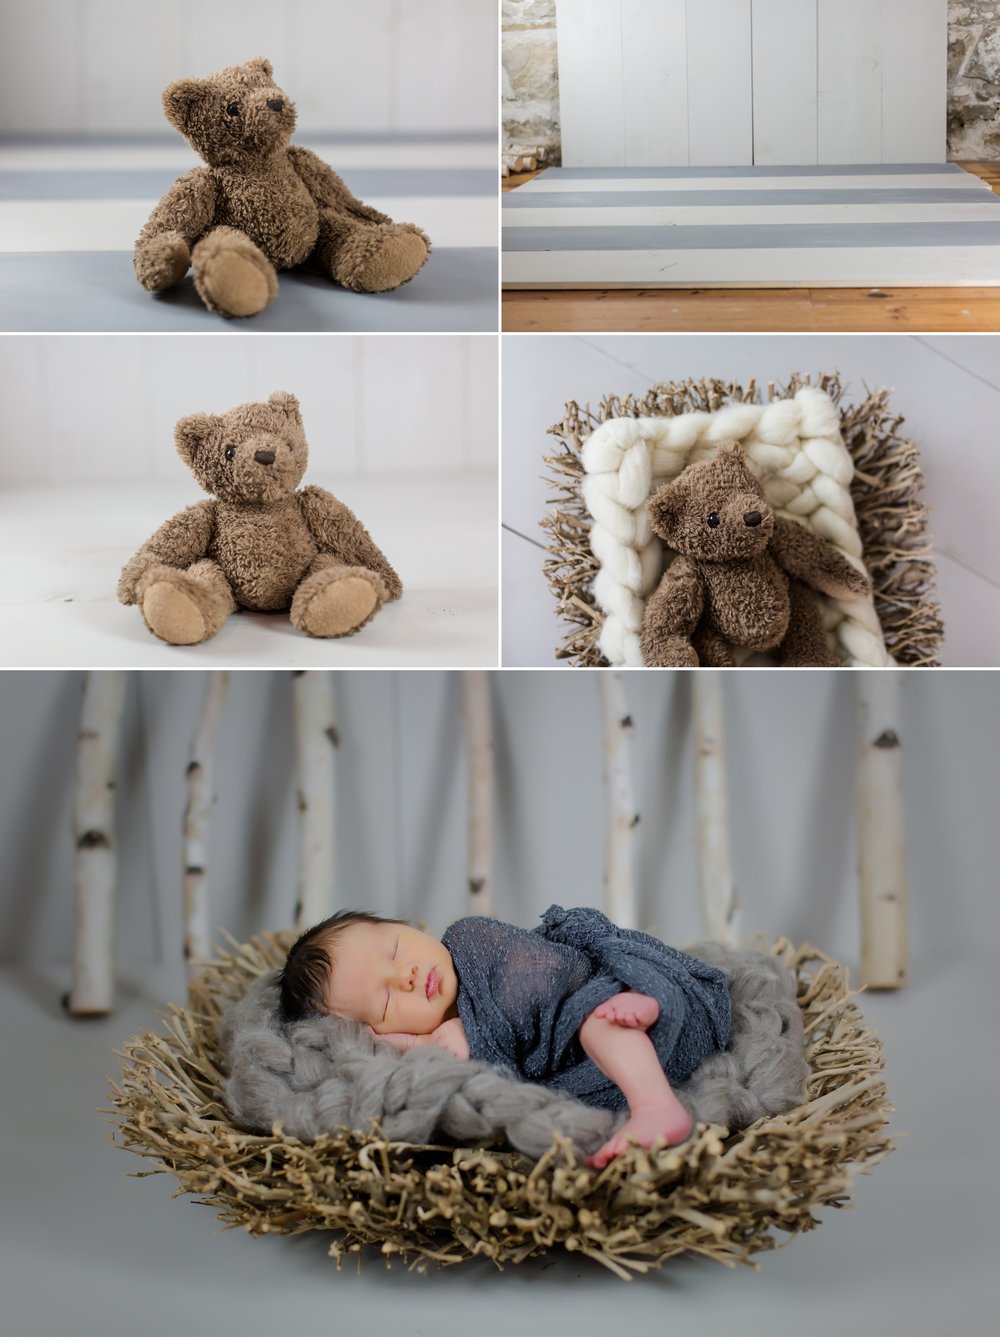
How it photographs:
I wouldn’t normally do the “two-toned look” below, but I wanted to show the color contrast with a professional photo. This look would be cute for a nautical set, though, don’t you think?
Believe it or not, the bottom photo of the baby sleeping, is actually taken on the lighter sides of the wood planks. Lighting makes all the difference and can completely change the color!
How much did this project cost?
Wood Planks = $90.12
2 Qt. Chalk Paint = $59.90
5 Paint Brushes = $10.95
2 Screw Hooks = $1.78
2 Sanding Sponges = $5.98
14ft Poly Rope = $7.28
Rags = I had some from another project, but old T-shirts work well, too!
Memories in front of backdrop = Priceless (you knew I was obligated to say something cheesy like that, right?)
Grand Total with sales tax = $190.17
